I've been holding out on you, piglets and pooh bears.
After a too-long hiatus in our hobby of throwing ridiculously elaborate parties, John and I've taken on planning not one but TWO parties over the next two months: a birthday party for me (WOOT), and a baby shower for a friend.
The shower is for the sister of one of my oldest and dearest friends, so she's basically family. When she became pregnant with her first child, she said if she could ever have a baby shower, she'd want John and I to plan it.
So of COURSE we're doing this party.
The mom-to-be has had a rough time the last several years, and now a high-risk pregnancy with multiple hospital visits already, so I've decided her shower is going to be an Event. (It's the one thing I can control, you know?) Besides, after our initial consult she told us to "surprise her," so I get to go hog wild. And it's Winnie-the-Pooh themed. Whee!
(Let's spare a moment of pity for John, who I've had running ragged on the build end, ha.)
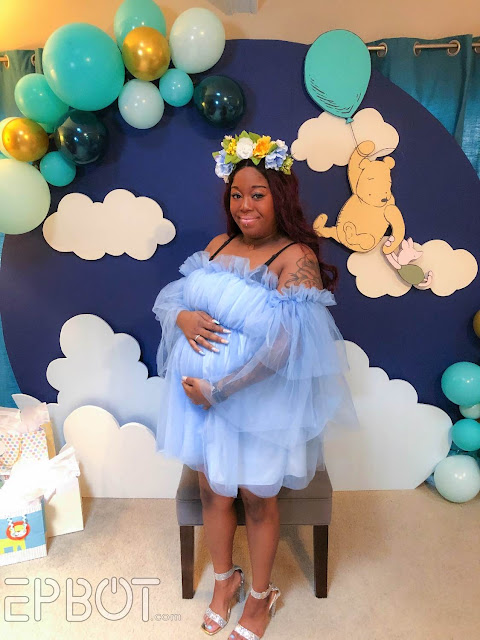
Our biggest build for the party is the photo backdrop, so I want to show y'all how we did it, what we used, and give you some guidelines for making your own.
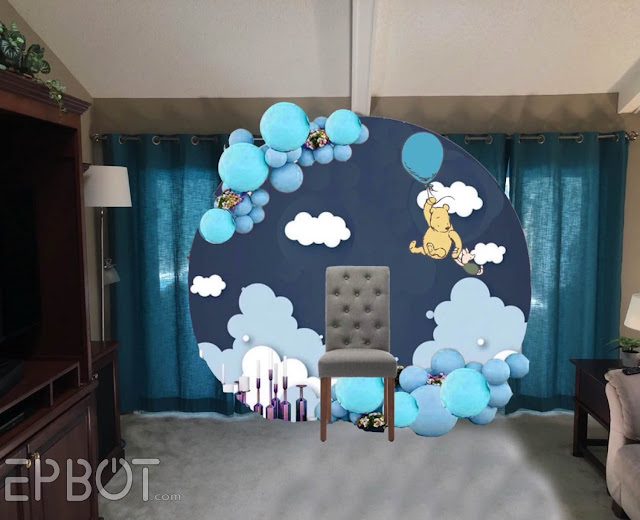
After many hours of research, rage-quitting, rage-re-starting, and banging my head against the virtual Pinterest Board wall, I threw enough ideas John's way for him to cobble together this mock-up in Photoshop:
Ideally you want your backdrop to be a focal point on its own while still leaving room for people to stand or sit in front of it. In our case the mom-to-be's chair will be in front while she opens presents, then the chair can be taken away afterward for group photos. (Check Pinterest if you need ideas; you'll find way too many.)
Most party backdrops are made with curtains on stands or fake greenery panels, but I'm here to sing the praises of pink foam board insulation, my crafty friends. Pink foam is feather-light, not-too-pricey, and easy to cut, sand, & paint. In our case it also helped that we had a whole bunch of scraps already in the garage.
We started with the smaller 3D elements. First we projected:
Traced:
...cut with a jigsaw, and sanded the edges to round them slightly:

Next I painted them with craft paint:
And finally I added the details and outline. The sanded edges gave me a good guide for this:
Ta-daaa!
(I made this sound fast, but really I worked on it over 3 nights.)
We repeated that for the balloon and second Pooh cut-out:


